Early Childhood Montessori Lessons
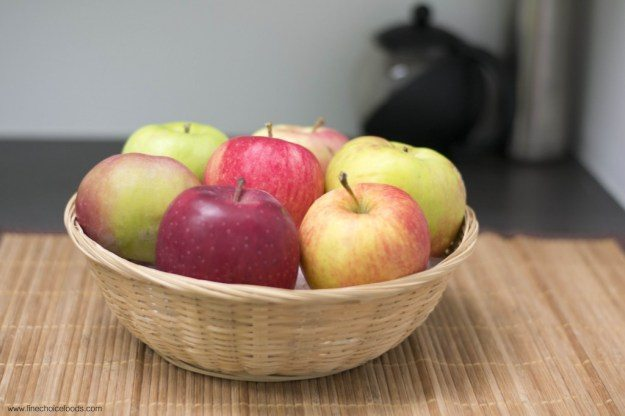
COMPARING APPLES TO APPLES
Steps:
Assemble a tray with several different kinds of apples. The apple selection should have some that are different colors, flavors, names, etc. Bring a cutting board, a knife, and some napkins.
Invite the child or group of children to work with you at a table.
Tell the children “Today we are going to compare apples. Did you know there are many different kinds of apples? Some apples taste sweet. Some apples taste tart. Some are sour. Apples grow in different parts of the world and can look and taste different from one another. Today we are going to taste a few different kinds of apples.”
Pick up the first apple. Take time to pause and look at it with the children. Talk about what color it is. Pass it around and talk about how it feels. Is it smooth? Is it rough? Does it have any imperfections? When the apple comes back to you place it on the cutting board, and carefully cut one slice.
Pass the first slice to a child.
Continue cutting slices and having the children try the apple.
Discuss with the children what they notice about how the apple tastes, looks, smells, etc.
Tell the children the name of this kind of apple.
Continue on in the same manner with the remaining kinds of apples, exploring and naming them.
Purpose:
● Language development
● Development of concentration
● Sensorial exploration
Age: 2.5-6

Steps:
Assemble a tray with two bowls. One bowl should be filled with leaves (real leaves if available!) The second bowl should be empty. Place a clothespin or tongs at the bottom of the tray.
Invite the child to work with you at a table.
If the child demonstrates right handedness, sit on his right and pick up the clothespin.
Demonstrate how to make the clothespin open by squeezing the top, holding it in front of the child, before placing the open clothespin over a leaf in the left hand bowl.
Transfer the leaf with the clothespin to the bowl on the right.
Continue on transferring leaves in this manner until the leaves from the left bowl are in the bowl on the right.
Invite the child to have a turn.
Purpose:
● Fine motor control
● Indirect preparation for writing and reading
● Development of concentration

Leaf Sewing
Steps:
Assemble a tray with a sturdy, good size leaf (large enough to sew the edges on), a hole punch, a needle, and a piece of thread long enough to stitch around the edges of the leaf.
Invite the child to work with you at a table.
Pick up the single hole punch in your right hand and the leaf in your left hand. Hold the open part of the hole punch over the edge of the leaf, moving slowly and carefully enough for the child to see what you are doing.
Squeeze the hole punch on the leaf, creating a hole far enough away from the edge of the leaf.
Continue on making holes around the edge of the leaf and inviting the child to have a turn eventually.
When you have punched holes around the edge of the leaf, pick up the sewing needle and insert the piece of thread, tying a knot at the bottom.
Pick up the leaf in your left hand and insert the needle with the thread through the hole at the top of the leaf, entering through the back and pulling the thread all the way through to the knot.
Put the needle through the next hole, entering through the front of the leaf this time.
Continue on with the dolphin stitch, alternating threading through the back and the front of the leaf.
Invite the child to have a turn when she is ready.
Purpose
● Fine motor control
● Development of concentration and sequential memory
● Care of self
Counting Sea Glass

Counting Sea Glass
Age: 4-5 **Child must be confident with the Association of Number Rods and Cards before being shown this lesson
Age: 4-5 **Child must be confident with the Association of Number Rods and Cards before being shown this lesson
Steps:
Prepare a tray with a bin of sand and sea glass mixed in. **NOTE - Be sure the sea glass pieces are large enough so as not to pose a choking hazard. The tray should also include a slotted spoon and an empty jar.
Invite the child to work with you at a rug.
Invite the child to retrieve the Sandpaper Numerals and arrange them in order across the top of the rug.
Pick up the slotted spoon and take a big scoop of sand in the bin. Gently shake the spoon side to side so the sand filters through back into the bin. Place the sea glass left in the spoon in the empty jar nearby.
Point to the first numeral on the rug. Count out the appropriate amount of seaglass for the numeral on the rug.
Place the seaglass under the numeral.
Continue on in this manner sifting out seaglass and placing the appropriate amount under each numeral.
Once all of the numerals have been counted, place the seaglass one at a time back into the sand, mixing it up so some are hidden.
Invite the child to have a turn.
Purpose:
Reinforcing one-to-one correspondence
Recognizing numerical symbols
Association of quantity and symbol
Development of concentration
Fine and gross motor development
Making Fruit Popsicles

Making Fruit Popsicles
Purpose:
● Sequential memory
● Fine and gross motor development
● Care of self
● Development of concentration
Steps:
Assemble a table or tray with one 6-count popsicle mold, 2 kiwis, 2 peaches, 5 strawberries, ½ cup of blueberries, and 2 16 oz bottles of flavored water, a cutting board, and child size knife.
Invite the child to make fruit popsicles with you.
Assuming all fruit has been washed beforehand. Select a strawberry, use the knife and demonstrate for the child how to cut the green part off. Then slice the strawberry into pieces, placing it into an empty bowl.
Demonstrate how to slice the peaches and kiwis in the same manner.
Open a popsicle mold and hold in your left hand. Use your right hand to spoon some pieces of fruit from each bowl into the mold until they almost reach the top.
Pick up the flavored water and pour into the mold, leaving about 2 inches from the top.
Pick up the bottom of the popsicle mold and close the mold.
Place on the tray and allow the child to fill the rest in same manner.
When all of the pops have been filled, place in the freezer about 4 hours or overnight.
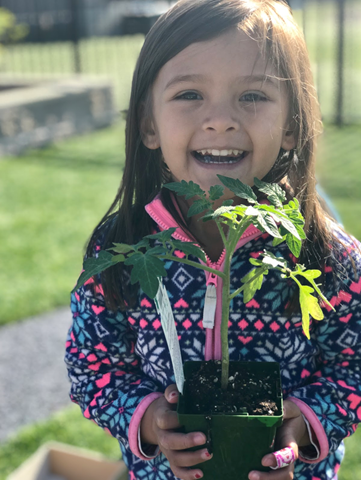
Planting Seeds
Age: 3-6
Steps:

Assemble a tray with a bowl of soil, a spoon, an empty plant pot, a jug of water, and a packet of seeds.
Invite the child to work at a table with you.
Tell the child “Today we are going to plant tomato seeds! (Or whichever plant you choose.)
Pick up the spoon and scoop a spoonful of soil into the pot on the tray.
Continue with a few more scoops.
Open the bag of seeds and place a few seeds in the soil.
Use the spoon to spoon more soil over the seeds.
Pick up the jug of water and pour some over the soil.
Invite the child to have a turn.
During this time you may wish to have a discussion with the child about what plants and people need in order to grow. (Food, sunlight, water, etc.)
Once they are finished planting you may invite the child to take his plant home with him to watch it grow or pick a special spot for it in the classroom with lots of light!
Extensions - You could turn this into a Geography lesson by incorporating the Montessori maps and talking about the different plants that grow in different parts of the world and need special climates in order to flourish.
Purpose:
Care of the environment
Development of concentration
Sequential memory
Vocabulary development
Rainy, Sunny, Snowy Clothing Sorting Activity
Age: 3-6

Steps:
Assemble a basket with three labels and accompanying pictures. There should be one label for “Cold Weather,” one for “Hot Weather,” and one for “Rainy Weather.” The photos should be pictures of real items one would wear in these types of weather such as mittens, hat, ski gear, rain boots, rain jacket, umbrella, bathing suit, sunglasses, etc.
Invite the child to work at a rug with you.
Take out the label for cold weather and read it as you place it down, or if working with a child who is reading have him read the label.
Place all of the items that go under cold weather under that category.
Do the same with hot weather and rainy weather.
Pick up all of the pictures in order and invite the child to place them under the correct label.
Once the child places them down in order, if the child is still interested, pick up the photos in random order and have the child sort them appropriately from random order.
Extensions:
On another day for a child who needs more movement you could set up 3 separate rugs in different areas of the room for the child to place each label and sort accordingly.
You could use the child’s extra clothes at school and sort his actual clothes into the appropriate categories
If the child is writing you could extend the activity by having him write down some activities he might do in cold weather, hot weather, and rainy weather.
Purpose:
Language development
Ability to sort and discriminate
Development of concentration
Care of self
Smelling and Matching Herbs
Age: 3-6
Steps:

Assemble a tray with a basket of three or more fresh herbs, and a set of matching picture cards with labels.
Invite the child to work with you at a table.
Pick up the first picture card with label and read it: “cilantro.” Place the card on the left side of the rug towards the upper edge.
Pick up the cilantro fresh herb from the tray. Take time to hold it to your nose and breathe in. Allow the child to take a minute to smell the herb.
Place the herb next to it’s matching picture card on the rug.
Continue on with two other herbs and their matching picture cards.
Once you have matched all of the herbs to their cards, place them in a row on the right side of the rug and have the child match them to the appropriate card.
Extension: Another day as an added challenge you could present the child with a basket of herbs and a blindfold and have him name the herbs without looking!
Purpose:
Care of the environment
Appreciation of nature
Language development
Development of concentration
Ability to sequence and match
Numbers and Counters
Age: 3-6
Steps:

Assemble a tray with 10 pieces of pipe cleaners, a small bowl with 64 pony beads, and numbers 1-10 on laminated hearts.
Invite the child to work with you at a rug.
Find the heart with number 1 on it and place on left side of rug in the middle.
Continue placing numbers 2-10 in order in a horizontal row on the rug.
Take on pipe cleaner and place one under each number on the rug.
Point to the number 1, select one pony bead, and slowly slide the bead onto the pipe cleaner.
Point to the number two, count out 2 pony beads onto the rug. “One, two.”
Place the beads one at a time on the pipe cleaner under the number two.
Continue on in this manner counting the appropriate number of beads for each pipe cleaner until you get to 10.
Take all of the beads off one at a time and place them back in the bowl.
Invite the child to have a turn.
Purpose:
Hand-eye coordination
Focus
Fine motor skills and pincer grip
Develop one-to-one counting skills
*Note: The child should already have had some practice with The Spindle Boxes and Cards and Counters. This lesson should be an extension.
Animal Footprints 3 Part Cards
Ages: 3-6
Steps:

Assemble a tray with 3 Part Cards with an assortment of animal tracks. One set of cards should have the tracks and the animal name, one set should have just the tracks, and one set should have just the animal name. You may also wish to have one basket with matching small animals.
Invite the child to work with you at a rug.
Select one animal track with the label from the pile and place on the left upper corner of the rug.
Select two more animal track cards in the same manner placing one under the other.
Select the three matching animals from the basket and place them in a random column on the right side of the rug.
Point to the first set of animal tracks and select the matching animal, saying it’s name after you place it next to it’s tracks.
Continue matching the other two animals with their tracks.
Place the animals back on the right hand side of the rug one at a time.
Invite the child to have a turn matching the animals to their footprints.
Extensions: You may extend this lesson by incorporating the other two sets of Vocabulary Cards or by adding more animals and footprints on other days.
**On another day you could take the lesson another step forward by making the animal prints in Play-Doh or clay.
Purpose:
Language development
Ability to concentrate
Vocabulary
Holiday Metal Insets
Age: 3-6
Steps:

Invite the child to work with you on Metal Insets at the table.
Bring the tray with the triangle inset, a piece of paper, and pencil holder with green and brown colored pencils.
Sitting on the child’s dominant side, tell her “We are going to work on Metal Insets today. But not just any Metal Insets! These are special holiday Metal Insets.
Pick up the triangle inset and place it on the paper, towards the top with the point at the top of the page.
Take the green colored pencil and trace counter-clockwise around the triangle.
Pick up the triangle inset and move it about an inch below the first and trace again in the same manner.
Pick up the triangle one more time and place it about an inch below the second and trace it one more time.
Use the green colored pencil to either shade in the triangles, or draw vertical lines as explained in the first Metal Inset presentation, filling in the triangles.
When the triangles are filled, use the brown colored pencil to draw a small rectangle vertically underneath the bottom triangle.
Ask the child what we made. (She should say “a tree!”)
Invite the child to have a turn and invite her to decorate her tree after with some ornaments.
Another Day:
Invite the child to the table to work on another special Metal Inset work. This time bring one blue colored pencil.
Place the triangle inset with the point facing the top of the paper and trace around moving counter clockwise as done above.
Slowly flip the triangle inset upside down, place the long side in the middle of the first triangle.
Trace the triangle again moving counter-clockwise.
Ask the child what we made. If she doesn’t know explain it is a Star of David.
Depending on the age of the child and the policies at your school you may wish to talk about how different families celebrate different holidays. Some celebrate Christmas, some celebrate Hanukkah, some celebrate Kwanzaa, some celebrate multiple. You can read books about different holidays and discuss similarities and differences.
Extensions:
Create a snowman Metal Inset with circles
Create a present Metal Inset with the rectangle
Create a Rudolph the Red-Nosed Reindeer with the oval Metal Inset
Purpose:
Develop pencil grip
Preparation for writing
Development of concentration
Stimulate interest in writing and language
Cultural exploration
Peace education
Button the Tail on the Turkey
Ages: 3-6
Steps:

Prepare ahead of time a turkey made of felt with buttons sewn on along the top edge of the turkey body. Prepare the feathers for the tail out of felt with one hole cut into the bottom. Assemble the feathers in a small bowl and have all items on a tray.
Invite the child to work at a table with you and bring the tray mentioned above.
Select one of the feathers from the bowl using your right hand.
Take the first button on the left side of the turkey in your left hand. Place the button halfway through the hole of the feather taking time to pause and show the child how the button is in the hole, then slowly pull the button all the way through.
Continue on with the next feather.
Allow the child to take over when ready with the rest of the feathers.
Extensions:
If the child is old enough to concentrate for longer periods of time you may allow the child to prepare the turkey ahead of time - sewing on buttons, gluing on eyes, etc.
Purpose:
Develop ability to concentrate
Fine motor skills
Strengthens muscles in hand
Hand-eye coordination
Executive function skills
Pumpkin Vocabulary Cards
Age range: 3-6 years old
Steps:

Prepare two sets of language cards: one with just the picture of parts of a pumpkin, and one set with the picture of parts of a pumpkin as well as the written label of the part.
Invite the child to work with you at a rug.
Begin with the set of cards that has the photo and the label. Place the first card in the upper left corner of the rug. Say it’s name. “Seed.” Have the child repeat the name.
Select the next card that has the photo and label and place it directly below the first. Say the name and have the child repeat.
Continue on in this manner placing cards in a vertical line on the left side of the rug.
Once you finish the set of cards with the photo and label, pick the first card in the second set. Carefully examine the photo, taking time to show the child as well before placing the photo next to the label and photo it matches.
Continue on matching the second set to the first.
After all cards are matched, pick them up one at a time, keeping each set together and invite the child to have a turn.
Extensions
When the child begins reading, you may wish to add a third set of cards with just labels for the child to match to the first set.
On another day you could also use these cards to discuss the life cycle of a pumpkin
Purpose
Development of language
Focus and concentration
Care of the environment
Making Applesauce
Ages: 4-6
Steps:
The materials you will need to gather for this lesson are: a Crockpot or slow cooker, several apples, an apple peeler, child size knife, water, lemon juice, sugar, ground cinnamon, salt, and a potato masher, and a cutting board.
Gather a small group of children at a table with the above materials.
Invite the children to don aprons and wash their hands.
Pick up one apple, and demonstrate how to use the peeler, carefully peeling one slice at a time and placing the peel into the empty trash bowl as you go.
When a child is ready to take over, allow them to have a turn peeling and placing the peels into the trash bowl.
When the apple is peeled, place the apple on the cutting board and pick up the apple cutter, being sure to note to the children that the apple cutter is sharp. They should use it carefully so as not to get hurt! Place the apple cutter on top of the apple and slowly, carefully push down, cutting the apple into slices.
Place the slices one at a time in the bottom of the crockpot.
Allow the children to take over peeling and slicing the apples as they show readiness.
When all of the apple slices have been placed add about ½ cup of water, some lemon juice, cinnamon, and a dash of salt. You can pre-measure these things in jars beforehand, so the children are able to pour them in independently (with just some supervision!)
Turn the slow cooker on high for 25-30 minutes, covering the top.
After the apples have cooked for 25-30 minutes, they should be soft. Pick up the potato masher and press gently but hard, crushing the cooked apples in the crockpot.
Allow a child to take over when ready, being sure to stand close by as the apples will be hot!
When the apples are mashed, after letting them cool a few minutes, you may wish to have a child use a large spoon to spoon the applesauce mixture into a large plain bowl.
Have the children spoon their applesauce into a bowl and enjoy!
Purpose:
Develops sequential memory
Ability to follow ordered directions
Fine motor skills
Gross motor skills
Care of self
Sensory development
Constellation 3 Part Cards
Age: 3 ½-6
Steps:

Invite the child to work with you on a rug. Bring a tray with Constellation 3 Part Cards.
Ask the child to name some things they have seen in the sky. If they do not bring up stars - ask them if they have noticed stars at night. Explain that some stars appear in the same shape every evening! These are called Constellations. We are going to match photos of Constellations.
Begin by slowly placing each Constellation card in a column on the left side of the rug. This set should have a label underneath with the Constellation name.
Once you have laid down the first set in a column, select the set of cards with no label underneath. Taking time to examine each card first, carefully match each one to the first set, placing it to the right.
If the child seems to be ready and interested, you may begin matching the label cards, placing them underneath the second set they correspond with.
Once you have matched all sets, pick up the cards in the reverse order, one at a time and invite the child to have a turn.
Extensions:
Send a note home to parents that their child is learning about constellations and invite them to explore the sky with their child at home in the evenings! You may wish to make copies of the cards to send home so parents know which constellations to look for.
You can make this Language lesson a Practical Life activity by creating copies of the Constellation Cards for Pin Punching.
For younger children in the classroom set one set of the picture cards on a try with a bowl of beans. Have the children use a pincer grip to place beans on the lines carefully.
Purpose:
Development of language and vocabulary
Cosmic education
Appreciation of Nature
Development of concentration
Planting a Seed
Age: 2-6
Steps:
Invite the child or small group to join you in the garden, or if your school does not have one, prepare some pots and a bag of soil. Bring with you a packet of seeds, a watering can, and some child-sized shovels.
Tell them today we are going to plant a seed! Ask the child or group if they have some ideas of what a seed might grow into. Ask the group if they have any idea what seeds need in order to grow? (You may also wish to make connections between what makes plants grow and what we humans and animals need to grow!)
Use the shovel to dig a small hole in the soil, growing slow and using purposeful movements to demonstrate control. Create a pile of soil to the right of the hole.
Select a few seeds from the packet, taking time to explain to the child what you are planting, and place them in the hole you have dug.
Pick up the shovel and replace and cover the hole with the piled soil to the right.
Use the watering can to demonstrate how to water the area.
Invite the child to have a turn!
Visit your seeds every day and talk about the progress as they grow!
Extensions:
Planting several different types of plants and seeds.
You could build on this activity later by doing a Language activity such as having cards that demonstrate a plant life cycle or labeling parts of a plant.
Purpose:
Care of the environment
Care of self
Appreciation of nature and cosmic education
Development of language
Development of concentration
Sink or Float
Age: 3-6
Steps:

Arrange a tray with a medium sized bowl, a pitcher, a basket of various objects (some that will sink and some that will float), and a mat that is labeled “sink” on one side and “float” on the other.
Invite the child to work with you at a table.
Pick up the pitcher and bring it to the sink to fill with water to a drawn line.
Go back to the table and pour the water into the empty bowl.
Sit down at the table and explain to the child “Some objects sink and some float. We are going to experiment to see which of these objects sinks and which floats.”
Pick up the first object from the basket place it in the water. If the object sinks, dry it on the towel and place it under the “sink” column on the mat. If it floats, place it under the “float” column.
Continue on in this manner, sorting the objects.
Allow the child to take over when ready.
When finished, dry each object one at a time and return them to the basket.
Dry the bowl and pitcher.
Extensions:
Make predictions with the child before testing the objects and record your hypotheses!
Purpose:
Development of concentration
Develop an appreciate and understanding of science
Introduction to the scientific method
Care of the Environment
Flower Lacing Cards
Age: 3-6

Steps:
Assemble a tray with flower shapes made of cardstock or another sort of heavy laminated paper. The flowers should have hole punches around the edges about 1 cm apart. Include a bowl with string with a knot tied at the end.
Invite the child to work with you at a table.
Pick up one of the lacing cards in your left hand, taking a moment to carefully observe with the child.
Pick up a piece of string in your right hand with the non-knotted end in your fingertips.
Slowly, insert the string through the bottom of one of the holes on the card. Show excitement and surprise as it begins to come out the top of the hole.
Pull the string all the way through the hole until the other end of the card meets the knot.
Take the non-knotted end and place it through the top of the next hole, turning the card over as you do to show the child it is coming out the other end.
Pull the string until the knot meets the card.
Continue on lacing in this manner to completion.
When you have laced the entire card, unlace it slowly in the same manner as you laced it.
Invite the child to have a turn!
Extensions:
Have the child decorate and create his own flower lacing cards. Provide materials like tissue paper to glue with, markers, sequins, etc. and a hole punch so they can punch their own holes on lines you have drawn.
Arrange a similar lesson but with needle and thread when the child shows readiness to sew!
Purpose:
Fine motor control
Hand-eye coordination
Following sequenced directions
Develops the pincer grip for writing preparation
Develop concentration
Care of self
Parts of a Flower
Age: 4-6
Steps:

A few months in advance, plant some paper whites or another type of flower in a clear jar with the children at a rug, or if time is of the essence, you may choose to buy one. It is important the jar is clear so the children can see the different parts of the plant.
Arrange a tray with the planted flower and a set of parts of the flower labels and a velcro dot on the back, and a jar of clothespins with the other half of the velcro piece on the front to attach labels to. The labels can include: flower, leaves, roots, stem, and any other parts you wish to introduce.
Invite the child to work at a table with you.
Slowly unroll the table mat from left to right.
Place the vase with the flowers on top of the table mat.
Tell the child “We are going to label the parts of the flower!”
Pick up the first label and read aloud - “Flower.”
Pick up a clothespin in your left hand and place the label with your right hand on the velcroed clothespin until it sticks.
Squeeze the clothespin until it opens and place gently on one of the flowers on the plant.
Continue on in this manner introducing one label at a time and place it on or near the corresponding part of the flower.
Prerequisites:
Child must have familiarity with clothespins prior to this lesson. They do not have to be a reader yet, but should have been introduced to some 2 and 3 part cards.
Purpose:
Language development
Focus and concentration
Appreciation for botany
Following sequenced directions
Going On a Color Hunt
Age: 2 ½-6
Steps:
Invite a small group of children to the rug.
Tell them we are going to play a game called “Going on a Color Hunt.” This month is March. In March we celebrate St. Patrick’s Day. On St. Patrick’s Day we wear green.”
Hold up a piece of paper or other item that is green. “This is green. Everyone say green.”
Explain to the group that one at a time we will take turns finding other items in the classroom that are green!
Invite the children to raise quiet hands if they would like a turn.
Pick a child to take a turn finding something green, which they will then bring back to the rug to share with the group.
When the child brings back the item, ask them what they brought.
Ask the group if the item is green. If it is, thank the child and ask them to put the item back where it belongs. If the item was not green - invite the child to try again and choose a partner if they would like some help.
Continue on in this manner giving turns to different children.
Extension: If you are working with an older group of children who have been practicing sound games - you may collect the green items in the middle of the rug and take turns at the end inviting children to return items by playing I Spy with beginning sounds of objects.
Example: “Emi, I spy with my little eye something that starts with the sound ‘B.’ Please place something that belongs with B-b, back on the shelf.”
Purpose:
Visual discrimination
Development of concentration
Developing patience and ability to take turns
Grace and courtesy
Language development
Incorporates purposeful movement
Heart Hole Punching
Age: 2 ½-6

Materials:
Tray with an array of pink, red, and white paper folded in half. Paper should have outline of a heart and small circles drawn around the perimeter.
Hole punch
Bucket
Steps:
Invite the child to work at a table with you.
Select a folded piece of paper from the bucket.
Pick up the hole punch with your dominant hand.
Hold the paper in front of the child’s face. Slide the paper in the hole punch directly over one of the drawn circles. Pause so the child can see what you are doing.
Squeeze hole punch until it clicks and creates a hole over one of the drawn circles.
Place hole punch down, pick up the circle that fell to the tray and place in trash bucket.
Continue on in this manner until the child seems ready, then offer them a turn.
Extensions:
For a child who is ready, you may wish to show them another day how to lace a string through the hole punched heart!
Purpose:
Fine motor skills
Hand-eye coordination
Development of concentration
Indirect preparation for writing
Metal Inset Snowflakes
Age: 3-6
Steps:
Arrange a Metal Inset Tray with a piece of paper, a colored pencil, and a triangle Metal Inset.
Invite the child to work at a table with you.
Pick up the metal inset and place it on the paper.
Pick up the colored pencil. Show the child your pencil grip and say “this is how you hold a pencil.”
With your left hand in the top left corner of the metal inset, begin tracing around the inset, starting at the top and moving clockwise until the shape is complete.
Lift the metal inset and rotate it 45 degrees.
Trace the inset again in same manner as before.
Lift the inset again 45 degrees and trace in same manner as before.
Continue on in this way until you have a snowflake-like shape.
Decorate the snowflake with designs using the colored pencil.
When satisfied, return the metal inset, pencil, and tray to the shelf.
Invite the child to have a turn.
Purpose:
Preparation for writing
Fine motor control
Development of concentration
Creativity
Making Gingerbread Men Cookies

Age: 3 ½-6
Materials:
3 cups flour
2 teaspoons ginger
1 teaspoon cinnamon
1 teaspoon baking soda
¼ teaspoon nutmeg
¼ teaspoon salt
¾ cups butter
¾ cup packed brown sugar
½ cup molasses
1 egg
1 teaspoon vanilla extract
Large mixing bowl
Wooden spoon
Cookie sheet
Rolling pin
Gingerbread men cookie cutters
Steps:
Invite the child to work with you at a table.
Depending on his/her level of readiness, help the child measure out and pour in the flour, ginger, cinnamon, baking soda, nutmeg, and salt into the large bowl. Set aside.
In the other bowl, mix the brown sugar and melted butter with a whisk until light and fluffy. Allow the child to take over once he has observed you.
Invite the child to pour in the molasses, egg, and vanilla and mix well with wooden spoon.
Gradually pour bowl of liquid ingredients into the large mixing bowl with dry ingredients.
Once a dough consistency is formed, place on the table and use a rolling pin to flatten out. Invite the child to take over once you have demonstrated motion.
Preheat oven to 350 degrees fahrenheit.
Pick up a gingerbread cookie cutter and place firmly over the dough, pressing down enough to make an imprint.
Pick up cookie cutter and use spatula to place on the cookie sheet.
Invite the child to have a turn using the cookie cutter and placing cookies on sheet in same manner.
Show child how to set a timer to 8-10 minutes.
Place cookie sheet in oven.
After 8-10 minutes, remove sheet from oven. Allow cookies to sit for 1-2 minutes to cool.
Allow child to decorate cookies as desired!
Purpose:
Develops ability to follow sequenced directions
Executive functions
Increase ability to concentrate
Practice mathematics skills such as counting, measuring, timing
Introduction to Science concepts - watching solids, liquids change form
Care of self
Turkey Feather Clothespins
Age: 2 ½-5

Steps:
Arrange a tray with a paper turkey or picture of a turkey and a bowl with clothespins with feathers glued onto the backs.
Invite the child to work on a special Clothespins lesson!
Bring the tray to the table.
Place the turkey in front of you and the child.
Select a clothespin from the bowl.
Squeeze the top of the clothespin and make eye contact with the child as the bottom opens.
Place the clothespin on the left side of the top of the turkey.
Continue on placing feathered clothespins from left to right along the top of the turkey.
When all the clothespins have been placed along the top, begin from the right slowly squeezing the top one at a time to release and placing them back in the bowl on the tray.
Invite the child to have a turn.
Purpose:
Fine motor skills
Development of concentration
Ability to follow sequenced directions
Pumpkin Scrubbing
Age: 3 ½-5

Steps:
Arrange a tray with a pumpkin, a pitcher, a scrub brush, a bar of soap or jar with pre-made “polish” (lemon juice and water), and a towel.
Invite the child to practice Pumpkin Scrubbing with you! Retrieve an apron for yourself and invite the child to do the same.
Bring the tray over to the dish washing area, placing it on a chair or the floor nearby.
Select the pitcher and fill with water to the line.
Pour the water into the left bin of the dish washing station.
Select the pitcher again and fill with water to the line.
Pour the water into the right tub of the dish washing station.
Pick up the pumpkin and gently place it in the left tub.
Pick up the brush off the tray and rub the soap or polish onto the bristles of the brush.
Place the brush on the pumpkin and begin scrubbing from left to right and top to bottom.
Continue in this manner until the pumpkin has suds all over.
Place the brush back on the tray.
Pick up the pumpkin and slowly, carefully move it from the left bin to the right bin.
Use the brush in the clean water to scrub away the suds on the pumpkin in same manner as before.
If suds remain, retrieve the pitcher, fill again to the line with water, and pour over the pumpkin.
When all suds are gone, remove the pumpkin from the right bin and place on a towel next to the dishwashing area.
Use towel to dry the pumpkin.
When dry, place the pumpkin back on the tray.
Using both hands and moving slowly, pick up the left bin and carefully pour water from the bin into the pitcher.
Carry pitcher to the sink and pour the water out.
Do the same with the right bin.
Use the towel to dry the left and right bins.
Invite the child to have a turn!
Purpose:
Develop fine and gross motor skills
Development of concentration
Use of executive functions
Ability to follow sequenced directions
Sweeping Leaves
Age: 3-6
Steps:

Before the child joins you, arrange a pile of leaves spread out on the floor.
Invite the child to sweep with you on the floor!
Arrange masking tape or use chalk to draw a square on the floor.
Put tape or chalk away.
Retrieve a broom, carrying it vertically with two hands with the broom head down towards the floor. Be sure to walk carefully so the child mimics your movements!
Walk around the square, pushing the leaves into the square with the broom as you go.
Hang up the broom and retrieve a dust pan and broom,
Use the brush to sweep leaves into the pan.
Place brush on the edge of the pan so leaves don’t fall out.
Carry the pan outside where you may place the leaves, or to a bag to gather and use for other activities.
Hang up dust pan and brush.
Remove tape from the floor or retrieve a sponge to wipe up chalk.
Purpose:
Control of movement
Isolate child’s area of cleanup
Development of care of environment
Development of concentration
Ability to sequence

Names and Faces Three-Part Cards
Age: 3 ½ - 6
Steps:
Prepare a set of laminated cards with a picture of each child in your classroom. Prepare a second set of cards with the same picture of each child, with their name printed at the bottom. Finally prepare a set of labels with no picture, and just each child’s name.
Invite one child or a few to work with you at a rug.
Select the set of cards with the children’s pictures and names on the bottom. Slowly place these cards down one at a time on the left side of the rug in a column.
Next, select the cards with just the children’s faces. Pick up the first of these cards, carefully examine it, and place it to the right of the picture card it matches.
Continue on matching the cards until the child is ready to take over this task.
If the child seems ready for an additional step, you may take out the third set of cards with the children’s names on them. Select the first label and scan the cards, looking for a match. When a match is found, place the label under the card without a label.
Continue on in this manner matching labels and pictures until the child shows readiness to take over.
Purpose:
Familiarize children with classmates’ names and faces
Development of letter recognition
Visual discrimination
Development of concentration
Fourth of July Food Prep
Age: 3 ½-6
Steps:

Prepare a table with a tray of graham crackers, a bowl of strawberries, a bowl of vanilla yogurt, a bowl of blueberries, spoons in each of the bowls, one large empty bowl, a pitcher, a cutting board, a child’s vegetable cutter or knife, a towel, and a serving tray.
Invite the child to work with you and proceed to the sink to wash your hands with soap and water.
Select a graham cracker and place it on the serving tray in front of you.
Use the spoon in the vanilla yogurt to spoon some yogurt onto the graham cracker. Use the back of the spoon or a spreader to spread the yogurt out on the cracker from left to right.
Place the yogurt spoon back in its bowl.
Use the spoon in the bowl of blueberries to spoon a small scoop onto the top left corner of the graham cracker on top of the yogurt.
Place the blueberry spoon back in its bowl.
Using the spoon in the strawberry bowl, place a strawberry on the cutting board.
Pick up the knife being sure to note to the child it is sharp and should be handled slowly and carefully! Hold the strawberry by its sides in your left hand on top of the cutting board. Use your right hand to pick up the knife and slowly, carefully press it down on the strawberry until it is cut in half.
Place the two halves of the strawberry on the yogurt on the graham cracker to the right of the group of blueberries.
Continue on cutting and placing strawberry halves in horizontal lines on the graham cracker, leaving some yogurt showing in between the lines.
Invite the child to participate when she shows readiness.
When you and the child have prepared a tray full of decorated graham crackers, encourage the child to bring the tray around and serve her friends!
Ocean Animal I Spy
Age: 3 ½-6
Steps:

Arrange a tray with a basket of ocean animals.
Invite the child to work with you at a rug.
Take an animal out of the basket, carefully examine it, and say it’s name followed by it’s initial sound.
Hand the animal to the child to repeat the name and sound.
Place the object on the rug.
Continue taking animals out of the basket, naming them, and announcing their initial sound. (If the child is 3 or just beginning sound games, you may start with 3 or less objects at a time and add objects as their confidence increases.)
Once all the animals have been taken out of the basket and placed on the rug, say to the child “I spy with my little eye something that starts with the sound ‘sss’ (or any initial sound fitting one of the objects.)
Continue on playing I spy until all the objects have been selected and identified!
Purpose:
Development of phonics knowledge
Introduction to classified vocabulary
Development of concentration
**Child must have been introduced to and practicing Sound Games
Seashell Sorting by Size
Ages 3-6

Steps:
Arrange a tray with a mat, a shell-shaped card labeled small, one labeled medium, and one labeled large, and a basket of seashells of varying sizes (being sure none pose a potential choking hazard.)
Invite the child to work with you at a table.
Tell the child “we are going to sort shells by size.”
Unroll the mat on the table.
Place the shell labeled “small” in the top left corner of the mat. Look at the child and say “small.”
Place the shell labeled ‘medium’ to the right of the first card. Say “medium.”
Place the shell labeled ‘large’ to the right of the second card and say “large.”
Select a shell from the basket, taking time to examine its features closely. Place it under the size card it corresponds to and say its size to the child. For example if it is a larger shell, place it under the card that says ‘large,’ and say “large.”
Continue selecting shells and placing them under their appropriate size cards.
When all shells have been sorted, pick them up one at a time and place them back in their basket.
Pick up the label cards and place them in a neat pile on the tray.
Roll up the mat and return it to the tray.
Invite the child to have a turn!
Purpose:
Visual discrimination
Language development
Indirect preparation for Math
Grading
Development of concentration
Beaded Rainbow
Ages 3-6
Steps:

Assemble a tray with a piece of styrofoam square, a red, orange, yellow, green, blue, and violet colored pipe cleaners, and a small bowl with corresponding colored pony beads.
Invite the child to work with you at a table.
Pick up the red pipe cleaner in your left hand.
With your right hand pick up a red pony bead from the bowl. Carefully slide the pony bead onto the red pipe cleaner.
Continue on until you have placed all the red pony beads onto the red pipe cleaner.
With your left hand, push the end of the pipe cleaner into the front left side of the styrofoam square.
Once the left side is in, use your right hand to push the other end of the pipe cleaner into the front right side of the styrofoam square. You should have made a half circle on the top of the styrofoam with the pipe cleaner.
Continue on with the rest of the colors in the same manner, placing subsequent pipe cleaners behind the first in order of the colors of the rainbow.
When finished, remove the pipe cleaners one at a time, removing the pony beads as well one at a time and returning them to their dish.
Invite the child to have a turn!
Purpose:
Fine motor skills
Hand-eye coordination
Language development
Color recognition
Visual discrimination and matching
Focus and concentration
Mitten Math
Age: 3-6
Steps:

Assemble a tray with mittens made of felt or cardstock in a pile, each with a number 1-10 on them, and a basket with smaller snowflakes or stickers.
Invite the child to join you at a rug with tray.
Remove pile of mittens and place each one down in on rug from left to right in sequential order saying the numbers as you go. Have the child repeat the numbers after you.
Point to number one mitten, say “one” and count one snowflake into your hand. Hand the one snowflake to the child and have them repeat “one,” before placing it on the number one mitten.
Continue on with the rest of the mittens in order, counting each snowflake in your hands before counting them into the child’s hands to place on the mitten.
Once all snowflakes have been counted and placed on appropriate mittens, pick up each snowflake one at a time and place back in basket on tray.
Pick up mittens in order from 1-10 and place in neat pile on tray.
Return tray to shelf.
Purpose:
Sequence 1-10
Reinforces one-to-one counting skills
Extension of Spindle Game lesson
Development of concentration
Oranges and Cloves
Age: 3-6

Steps:
Assemble a tray with half of an orange, a pin puncher, or pencil, or toothpick, (depending on age of children and restrictions of school for safety purposes), and bowl of cloves.
Pick up the pencil or pin puncher and explain to the child this is a sharp object and can be dangerous and should be used very carefully!
Demonstrate how to hold the pencil or pin puncher and slowly, carefully, poke a hole in the orange.
Place the pencil or pin puncher down and insert a clove into the orange.
Invite the child to have a turn.
Be sure to talk to the child about the smells they are noticing!
Purpose:
Sense of smell stimulated
Fine motor control
Develops pencil grip
Concentration and focus
Holiday Metal Inset Variation
Ages: 3-6
Steps:

Invite child to complete a Metal Inset work with you! Select a tray from the shelf, a triangle inset or frame, a brown, green, yellow, blue, and red colored pencils. Bring materials to the table.
Place triangle inset or frame on top of paper on right side of the tray. Pick up the green colored pencil and show the child your pencil grip. Say “This is how you hold a pencil!” (May not be necessary if child has already mastered original Metal Inset work.)
Starting at the bottom left corner of the triangle, slowly trace the frame or inset to make a triangle on the page. Point out the child what shape you made.
Use the green colored pencil to shade in the triangle.
Draw a small rectangle at the bottom of the triangle with the brown colored pencil.
Use the red and blue colored pencils to make circles on the tree for the ornaments.
Use the yellow colored pencil to make a star at the top of the tree.
Invite the child to make her own Metal Inset tree!
Purpose:
Develops pencil grip and fine motor skills
Work left to right to indirectly prepare for reading
Develops concentration
Understanding of geometry
Smelling Spices of India
Ages: 2 ½-6

Steps:
Arrange an assortment of spices in different jars with labels on a tray. Some examples may be tumeric, cloves, cumin, coriander, and cardamom. You may use Montessori Smelling Bottles, or a different type of container that will allow the child to smell, see, and maybe even taste the different spices!
Bring the tray of spices to a table.
Explain to the child you are going to explore spices of India. (You may wish to bring the Globe or Continent Map to the table as well to point out where India is.)
Pick up the first smelling jar/bottle and take a minute to demonstrate how to deeply inhale the scent.
Hand the jar to the child to do the same.
Introduce the name of the spice and take a minute to discuss what types of food it may be used in, how it grows, any medicinal purposes it has, etc.
Continue on in this manner with the remaining spices.
After the child has been introduced to each of the scents, and perhaps tasted a few, you may wish to expand on the lesson by covering the child’s eyes with a blindfold and having them smell each jar and try to identify the scent without looking!
Purpose:
Develops sense of smell and discrimination
Visual discrimination
Concentration
Exploring and learning about other cultures
Language development

Pumpkin Hammering
Ages 3-6
Steps:
Assemble a tray with a Pumpkin, a child-size hammer, and a bowl with golf tees inside.
Pick up the hammer first and explain to the child this is a tool that could hurt someone and should be used carefully!
Sit next to the child and pick up a tee,, holding it carefully against the side of the pumpkin.
Carefully and slowly hammer the tee into the pumpkin.
Once the tee is all the way in, invite the child to have a turn!
Purpose:
Helps develop fine and gross motor control
Promotes strong hand-eye coordination
Develops the child’s attention span
Following sequenced directions
Leaf Lacing
Ages: 2-5
Steps:
Laminate a leaf and hole punch holes around the edges of the leaf. Thread a shoelace, knotted at the end, through the bottom of the top hole.
Pull lace all the way through to knot. Arrange lesson on a tray.
Thread lace through the top of next hole, moving clockwise.
Continue lacing through the top, followed by the bottom, until the shoelace is laced all the way through. Be sure to make slow, deliberate movements, making eye contact with the child after each step to be sure she is following.
Undo lacing in same manner as above and invite the child to have a turn.
Purpose:
Develops fine motor skills, pincer grip
Hand-Eye Coordination
Develops focus and attention span
Promotes independence by preparing for tying shoes
Identifying Leaves
Age: 3-5

Steps:

Collect an assortment of leaves from outside with children or have children bring in leaves they have collected at home. Assemble leaves in a basket.
Unroll a rug and bring each tray from the Botany Cabinet beside the rug.
Slowly remove each inset from the trays along the top edge of the rug.
Gently remove one leaf that the child has collected or brought from home from the basket and carefully examine it. Hand the leaf to the child to examine.
Take time to look at each of the inset leaves at the top of the rug before placing the leaf in your hand under the inset it most closely matches.
Do same with the rest of the leaves in the basket.
Place leaves back in basket after matching all.
Place insets from left to right into frames in the tray
Invite child to have a turn.
Purpose:
Visual discrimination
Strengthens ability to follow sequenced directions
Develops attention span
Appreciation of nature/environment
Develops vocabulary
Packing a Suitcase
Ages: 2 ½ - 6
Steps:


Talk with your child about what they might need to pack if they were to go on a trip! If you are planning a trip to the beach, of course they will want to bring their bathing suit, sunscreen, perhaps a hat, toothbrush, etc.
Arrange the clothes, toiletries, shoes, a book, and any toys you have talk about together and your child has chosen to bring on a trip, in a basket on a table.
Set a suitcase next to the basket and demonstrate for the child how to open it.
Take heaviest items (such as shoes) out of the basket and place neatly in bottom of suitcase.
Next take each item of clothing, one at a time, and unfold it on the table. Demonstrate for the child how to fold up shirts or pants (left to right, top to bottom) and neatly arrange them in the suitcase. (Don’t be afraid to be meticulous! The child will surprise you with how much they observe and mimic.)
Books, toys, and toiletries in a bag can go on top!
Take everything out of the suitcase one at a time, after you have demonstrated, and invite your child to have a turn to practice.
Purpose:
Develops long, sequential memory and attention span
Ability to follow directions
Crossing the midline
Care of self and independence
Develops fine and gross motor skills
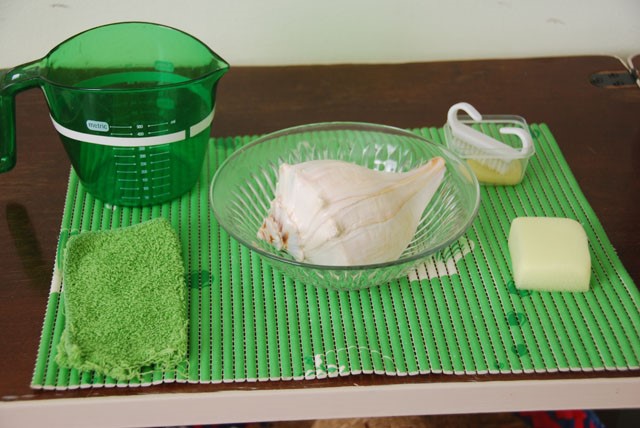
Shell Scrubbing
Ages: 3-6
Steps:
1. Arrange a tray with a large shell, large basin, pitcher, sponge, toothbrush, small towel, and soap or some sort of polish.
2. Retrieve an apron for yourself and the child.
3. Fill the pitcher with water and slowly pour the water into the basin on the tray.
4. Put the shell in the water and use the sponge to carefully wash the shell from left to right, top to bottom, making sure to use slow, purposeful movements for the child to mimic.
5. Take the shell out of the water and place on the tray. Dip the sponge into the polish you have chosen and apply the polish to the shell as explained above.
6. Use a toothbrush to get in any cracks or crevices the shell has.
7. Wet the sponge one last time in the water and remove the polish as donebefore.
8. Fold the towel left to right, top to bottom and gently dry the shell in same manner.
9. Place the bowl with polish into the basin with water to wash it out. Dry the inside and outside with towel.
10. Pour the water from the basin into the pitcher and pour this into the sink.
11. Fold the towel from left to right, top to bottom and dry the inside of the basin. Gently flip it over and dry the outside.
12. Dry the pitcher in same manner.
13. Allow the child to have a turn to polish the seashell.
Purpose:
1. Develops attention span and concentration
2. Increases ability to follow sequenced directions
3. Develops fine motor skills and hand-eye coordination
4. Care of the environment
5. Attention to detail
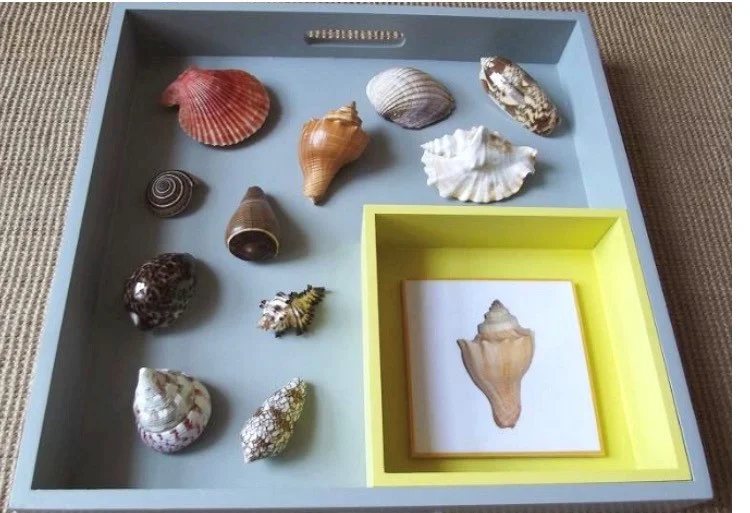
Matching Shells to Cards
Ages: 2 ½-6
Steps:
1. Invite the child to the rug.
2. Prepare a tray with a basket of 6-10 different looking seashells with matching picture cards.
3. Carefully bring one shell out at a time, taking time to examine it slowly, and hand to child to do the same. Then place the shells in a column, one at a time on the left side of the rug.
4. Place the matching picture card next to its corresponding shell in order.
5. Pick the cards up in order and allow the child to match the cards to the shell.
6. Next time mix up the order of the cards to provide more of a challenge.
7. Return the shells to the basket as well as the cards.
Purpose:
1. Visual discrimination
2. Appreciation of nature
3. Ability to follow sequenced directions
4. Develops attention span
Sorting Shells
15 months - 4 years
Steps:

Collect an assortment of shells. Some should have similar attributes (color, shape, size) that they can be identified and discriminated by
Arrange shells in a basket and invite the child to a rug
Retrieve one shell from the basket and carefully examine it before handing it to the child to do the same. Place on left side of rug.
Select a shell with a different identifying attribute and examine as before, allowing child to do the same and place to the right of previous shell.
Continue on in this manner, placing shells that have matching attributes together in a group
Once all the shells are sorted by size, color, or shape, gently replace the, one at a time to the basket and invite the child to complete the lesson by himself.
Another day, sort the shells by a different identifier.
Purpose:
Develops visual discrimination and ability to classify
Develops concentration
Attention to detail
Fine motor and pincer grip essential later for pencil grip
Stimulating interest and appreciation for nature

Rain Clouds
Age: 2 ½-6
Purpose:
To teach the child about rain clouds and precipitation
Develops fine motor skills via pouring and pincer grip via use of the eye dropper
Develops focus and attention span as well as ability to follow sequenced directions

Steps:
A tray is prepared with a jar of 5-6 cotton balls, one smaller tray or ball, a small jar, a pitcher with water, an eye dropper, a cloth, and a mat for the table.
Invite the child to learn how to form a rain cloud.
Place the mat on the table and the other items on top.
Demonstrate how to form a cloud out of the cotton ball by gently stretching the cotton ball to make it puffy.
Pour the water from the pitcher into the small jar.
Holding the cotton ball in one hand over the smaller tray, fill the eye dropper with water and slowly drop water a drop at a time.
As the cotton ball becomes full, note to the child as it begins to drip and forms “rain.”
Gently squeeze the rest of the water from the cotton ball into the dish and indicate how much water has accumulated. The child may wish to measure the amount!